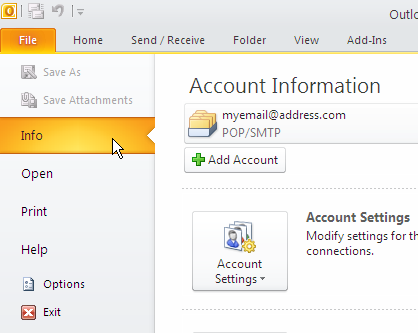
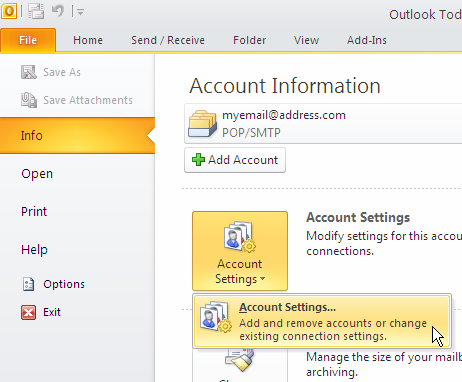
Here's the standard procedure for updating your SMTP server in Outlook. For this example, we'll show you how to change the SMTP server using Outlook 2010.
Step 1
From the File Menu of Microsoft Outlook, select 'Info'.

Step 2
Select Account Settings and then click on the dropdown arrow next to 'Account Settings...'.

Step 3
Select your email account from the list and click the Change button.
Step 4
Enter your email address in the E-mail Address field. Next, change the Outgoing mail server (SMTP) to mail.yourdomainname.com. The Incoming mail server and Outgoing mail server should be the same. You should replace yourdomain.com with your site's URL. (Ex. If your website is http://gocubs.com or http://www.gocubs.com, your new email server would be mail.gocubs.com.)
If your email address and password are populated in the Login Information field, these will remain the same. If these fields are blank, you will need to re-enter your email address in the User Name field, and enter your domain email account password in the Password field.
Step 7
Test your account settings by clicking on the 'Test Account Settings...' button.
If the test is successful, congratulations—you’ve just changed your own SMTP server settings! If the test comes back with an error, continue on to our Troubleshooting Tips below.
TROUBLESHOOTING TIPS
If you are having problems connecting:
Step 1
Click on the 'More Settings...' button to open the advanced settings. Next, cick on the 'Outgoing Server' tab. Make sure that the setting ‘My outgoing server (SMTP) requires authentication‘ is enabled, select Log on using, then enter your SMTP Username into the User Name field, and your SMTP Password into the Password field. Make sure that Remember password is enabled and Require Secure Password Authentication is disabled.
Step 2
Click on the 'Advanced' tab. Change your Outgoing server (SMTP) Port Number to 465. If you have troubles with authentication, you can try another Port number, such as 143 or 25.
For the setting ‘Use the following type of encrypted connection’, select TLS using the dropdown menu.
Step 3
If you have gone through Step 1 and Step 2 and still can't get your email client to connect to your account on the new server, make sure you have entered all of the values correctly. If all else fails, give us a call or open a support ticket and we will help you troubleshoot the issue.

