Here are instructions for changing your SMTP server settings if you use Apple’s Mail application on your Mac, iPhone or iPad. For this example, we'll show you how to update these settings in Mail Version 11.2. Please note that in older versions of Apple Mail, screens may look a bit different.
Step 1
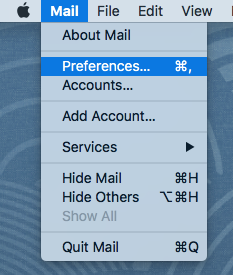
From the Mail Menu, select 'Preferences...'.

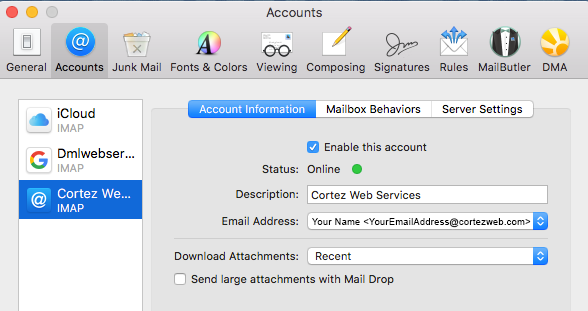
On the left side, locate your Cortez Web Services email account. If you are using Mail for more than one email account, you may have to select it from the list of accounts.

Step 2
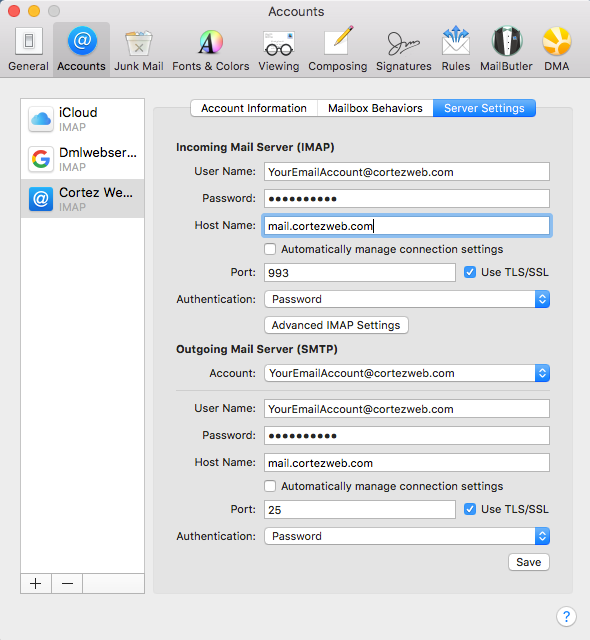
On the next screen, you should already have your User Name (email address), Password, Host Name, and Port settings configured. Leave all of the settings as-is, changing only the Host Name address. Both the Incoming Mail Server and the Outgoing Mail Server will need to be updated to the new mail server address, mail.yourdomainname.com. You should replace yourdomainname.com with your website's URL. (Ex. If your website is http://gocubs.com or http://www.gocubs.com, your new email server would be mail.gocubs.com.)

Step 3
Hit Save, and wait for Mail to verify your new server settings. If you receive an error, ensure that you have entered the new Host Name correctly, and that you have not left any required fields blank. If nothing happens, you have most likely changed your SMTP server settings successfully. Now would be a great time to give yourself a pat on the back, and send somebody you love a nice email.
Got Problems? Feel free to give us a call or open a support ticket, and we'll help you troubleshoot the issue.

